What a Water Stop Does (and When to Use It)
A Water Stop is a continuous barrier embedded across concrete joints to interrupt leakage paths under hydrostatic pressure; by blocking flow at cold, construction, and movement joints, a Water Stop protects basements, retaining walls, tanks, and lift pits from moisture ingress and long-term deterioration.

Choosing the Right Concrete Profile
For cast-in-place foundations, a Concrete water stop with centerbulb or dumbbell geometry manages expected joint opening and shear while resisting chemicals common on job sites; in podium decks and treatment plants, a Concrete water stop sized to the head of water and reinforcement congestion ensures fit, consolidation, and durable performance.
- Match width to joint movement and expected head of water.
- Use centerbulb styles where expansion/contraction is anticipated.
- Confirm compatibility with admixtures and nearby sealants.

Getting a Watertight Seal That Lasts
In aggressive environments, a Waterproof water stop delivers long-term sealing by combining chemical resistance with high tear strength and reliable splicing methods; specify factory or field heat-welded junctions so a Waterproof water stop remains continuous through tees, crosses, and terminations without weak points.
- Demand tested splice procedures and trained installers.
- Protect profiles from UV and site damage before the pour.
- Document locations for future penetrations and repairs.

When a Flexible Profile Is the Best Choice
For irregular substrates, rebar congestion, and complex penetrations, a Flexible water stop adapts to curves and offsets while maintaining contact with the joint line; hydrophilic variants of a Flexible water stop swell on contact with water to seal small voids in cold joints and around pipes where vibration compaction is challenging.
- Prime surfaces per manufacturer guidance for swelling strips.
- Keep strips dry until placement to avoid premature expansion.
- Use mechanical fixings to prevent displacement during pours.

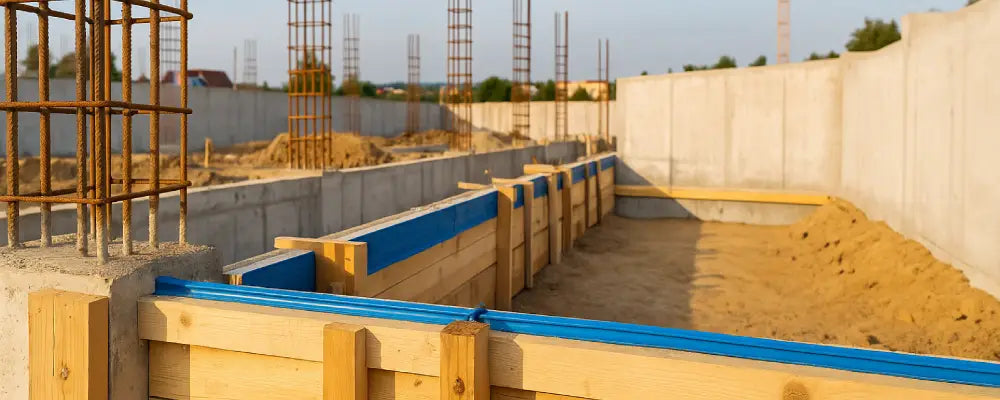
Step-by-Step Installation & Site Tips
On civil projects in the region, a construction water stop must be continuous, correctly aligned, and securely fixed before concrete placement; with careful splicing and vibration control, a Construction water stop becomes part of the structure’s first line of defense against leaks.
- Plan the joint layout: map all construction, expansion, and cold joints; order correct junction pieces.
- Pre-fit and secure: tie or clamp the profile to steel or formwork to hold center on the joint line.
- Splice correctly: heat-weld compatible materials; use approved kits for corners, tees, and crosses.
- Place concrete carefully: vibrate around the web to eliminate voids without folding the profile.
- Inspect continuity: verify alignment, cover, and splice quality before closing forms.
- Cure and test: allow proper curing; where practical, conduct a controlled water test and mark as-builts.
- Do shield profiles from puncture, rebar ends, and sharp form edges.
- Don’t leave gaps at splices or mix incompatible materials.
- Keep a repair plan ready (injection ports/resins) for post-pour remediation.
FAQs
- 1) How do I size the profile for my project?
- Consider joint movement, water head, and rebar density. Wider webs and centerbulbs suit larger movements; verify with supplier data sheets and local codes.
- 2) Can I mix different materials across one joint?
- Avoid mixing incompatible polymers. Use manufacturer-approved splicing and keep the barrier continuous through all transitions and penetrations.
- 3) What if minor seepage appears after commissioning?
- Identify the joint path and pressure. Many leaks can be stopped with low-viscosity resin injection at the joint line without structural demolition.